Apply DeckWise® JoistTape™ or a bead of exterior adhesive to each joist approximately 3/8 " in width. For adhesives, you may want to do this as you go so, that, it does not dry before completion if you have a larger area to install. While adhesive adds hold-down strength to the boards, it does not prevent wood rot. JoistTape™ prevents joist wood rot as well as seals around deck screws. Even though joists may seem even, changes in weather can cause board movement. Both JoistTape™ and/or adhesive will also help prevent squeaking from uneven joists in the future.

Use a 1/8" drill bit to pre-drill pilot holes every 24" along the ledger board to secure the starter board. Drill deep enough to penetrate the deck board and not the underlying ledger. All ThermoClipTM Hidden Deck Fastener systems, 175 count and above, include a 1/8" high speed drill bit. We suggest using the 3-in-1 DeckWise® Drill&Drive™ (not included in ThermoClipTM Fastener kits), which has a 1/8" drill bit, 3/8" countersink bit, and screw gun T15 tip that will help speed up this process.

Use a 3/8" countersink bit to bore a hole approximately 1/4" to 3/8" deep (depending on your deck board thickness) for each screw to be hidden by a ThermoPlugTM wood plug. Be sure your countersink bit is sharp and leaves a clean edge.

Next, firmly drive a deck screw down into the countersunk hole into the joist below. All ThermoClipTM fastener kits, 175 count and above, have extra stainless steel deck screws included in them for starter boards. (Wood plugs will next be installed into the countersunk holes to hide the deck screws and create a smooth, family friendly surface free of screw heads.)
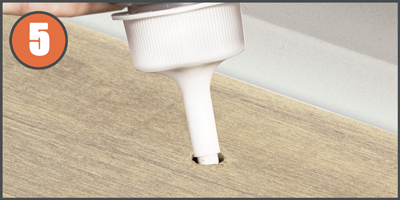
Place a drop of wood glue (Gorilla Glue® is suggested) into the countersink hole from the above steps. This will guarantee the wood plug from popping up in the future. Plus, it will act as a moisture barrier, sealing the countersunk hole and screw.

Insert a 3/8" tapered ThermoPlugTM wood plug and tap it down with a hammer so it fits snug into the hole. Wipe away any excess glue that may squeeze out. (NOTE: We always encourage finding the wood grain in the plug and aligning it with the deck board wood grain. This will help ensure the plug is hidden as much as possible on the surface.) When installing hardwood plugs, Gorilla Glue® reaches 80% cure after just 1-2 hours. For best drying results a 24 hour wait period will achieve a 100% cure before trimming excess plug material.

Once the plug is hammered in and the glue is dry, remove any excess plug material protruding above the surface of the deck board. You can accomplish this by using a flush cut pull saw, belt sander or an orbital sander with 80 grit sand paper.
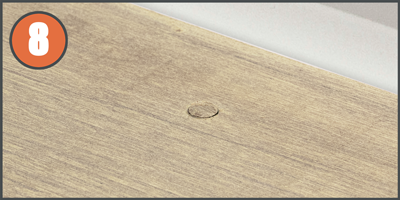
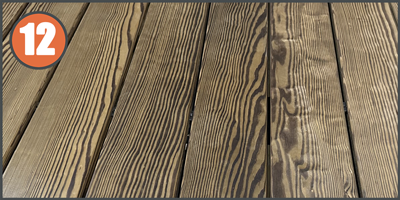
Sand smooth all areas where a wood plug was installed so the plug is flush with deck surface. A round, random orbit sander with 80-120 grit sand paper works best. When sanding is finished, we suggest using Ipe Oil® or WiseCoat® for a beautiful natural wood color over your entire deck.
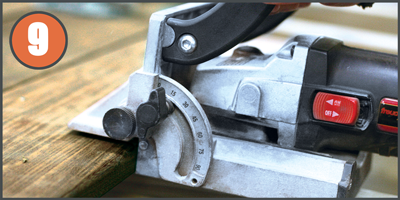
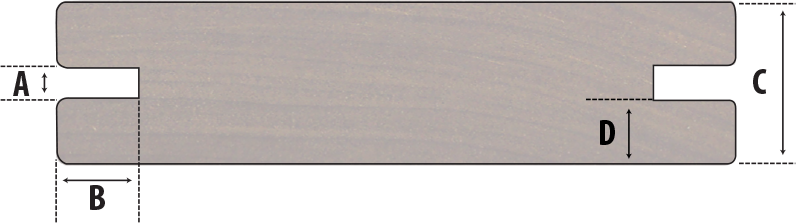
Use a biscuit jointer or a router (with a 5/32" X 1/2" slot cutting bit) to cut a slot in the edge of deck board above each joist. You will want to center this groove in the board so there is a symmetrical profile for best results using the ThermoClipTM Hidden Deck Fasteners by DeckWise®.
NOTE: Pre-grooved deck boards are now available from many decking suppliers. If you are using pre-grooved decking, skip this step and proceed to step 10.
Apply WiseWrap® JoistTape™ or a bead of exterior adhesive to each joist approximately 3/8" in width. For adhesives, you may want to do this as you go so that, it does not dry before completion if you have a larger area to install. While adhesive adds hold-down strength to the boards, it does not prevent wood rot. WiseWrap® JoistTape™ prevents joist wood rot as well as seals around deck screws. Even though joists may seem even, changes in weather can cause board movement. Both WiseWrap® JoistTape™ and/or adhesive will also help prevent squeaking from unlevel joists.
Use a 1/8" drill bit to pre-drill pilot holes every 24" along the ledger board to secure the starter board. Drill deep enough to penetrate the deck board and not the underlying ledger. All ThermoClip™ Hidden Deck Fastener systems, 175 count and above, include a 1/8" high speed drill bit. We suggest using the 3-in-1 DeckWise® Drill&Drive™ (not included in ThermoClip™ Fastener kits), which has a 1/8" drill bit, 3/8" countersink bit, and screw gun T15 tip that will help speed up this process.
Use a 3/8" countersink bit to bore a hole approximately 1/4" to 3/8" deep (depending on your deck board thickness) for each screw to be hidden by a ThermoPlug™ wood plug. Be sure your countersink bit is sharp and leaves a clean edge.
Next, firmly drive a deck screw down into the countersunk hole into the joist below. All ThermoClip™ fastener kits, 175 count and above, have extra stainless steel deck screws included in them for starter boards. (Wood plugs will next be installed into the countersunk holes to hide the deck screws and create a smooth, family friendly surface free of screw heads.)
Place a drop of wood glue (Gorilla Glue® is suggested) into the countersink hole from the above steps. This will secure the wood plug from popping up in the future. Plus, it will act as a moisture barrier, sealing the countersunk hole and screw.
Insert a 3/8" tapered ThermoPlug™ wood plug and tap it down with a hammer so it fits snug into the hole. Wipe away any excess glue that may squeeze out. (NOTE: We always encourage finding the wood grain in the plug and aligning it with the deck board wood grain. This will help ensure the plug is hidden as much as possible on the surface.) When installing hardwood plugs, Gorilla Glue® reaches 80% cure after just 1-2 hours. For best drying results a 24 hour wait period will achieve a 100% cure before trimming excess plug material.
Once the plug is hammered in and the glue is dry, remove any excess plug material protruding above the surface of the deck board. You can accomplish this by using a flush cut pull saw, belt sander or an orbital sander with 80 grit sand paper.
Sand smooth all areas where a wood plug was installed so the plug is flush with deck surface. A round, random orbit sander with 80-120 grit sand paper works best. When sanding is finished, we suggest using Ipe Oil®, Ipe Oil Plus™ or WiseCoat® for a beautiful natural wood color over your entire deck.
Use a biscuit jointer or a router (with a 5/32" X 1/2" slot cutting bit) to cut a slot in the edge of deck board above each joist. You will want to center this groove in the board so there is a symmetrical profile for best results using the ThermoClip™ Hidden Deck Fasteners by DeckWise®.
NOTE: Pre-grooved deck boards are now available from many decking suppliers. If you are using pre-grooved decking, skip this step and proceed to step 10.
Used to drill pilot holes and for installing starter and outside edge boards with wood plugs. A cordless screwgun with an adjustable clutch is recommended so torque can be properly set to avoid over-tightening of screws. Use a 1/8" drill bit and a 3/8" countersink bit or the 3-in-1 DeckWise® Drill&Drive™ Drill Bit Set.
Used to prevent joist wood rot as well as seals around deck screws.
Used as a leveling agent for uneven joists.
A common cabinet maker tool available at most hardware stores and home centers. Used to make a slot in the edge of the deck boards to allow insertion of the ThermoClip™ fasteners.
Can be used if you do not have access to a biscuit jointer. Use the DeckWise® 4-Wing Slot Cutter Router Bit or a #20 biscuit cutting router bit, also called a 5/32" slot cutting bit. This method is actually preferred by some installers.
DeckWise® 4-Wing Router Bits provide a smooth symetrical cut for creating slots and grooves in decking material. 1/4" and 1/2" arbor sizes available and fit most router devices.
* Not required for use with pre-grooved decking.

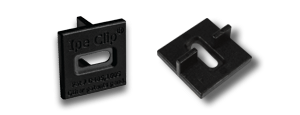
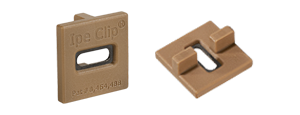
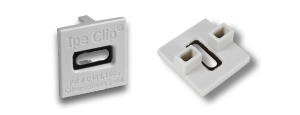
Insert a stainless-steel screw at a 90° angle through the hole in the center of the ThermoClip™ fastener, and down into the joist. It should not take much downward pressure to tighten the deck board. Once the board is snug to the joist you can install another fastener clip over the next joist. A screw gun with an adjustable clutch works best for this by turning the clutch down to avoid over-driving screws. Secure each board using one fastener and one screw per joist.

Place clips in the leading-edge groove and loosely screw them into the joist, holding the clip level with your fingers and leaving the screw shaft protruding above the board surface. When a row of clips is in place, install the next board over the loose clips into the groove of the board. Once a few boards are installed with fasteners, go back and tighten down the rows of screws and clips in each gap.
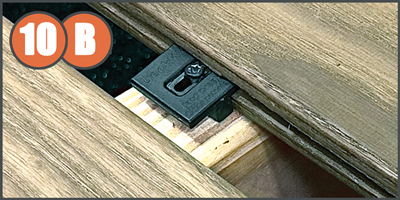
To keep the fastener clip straight and secure in the leading-edge groove; cut a piece of scrap groove board and use it to help hold the hidden fastener down before screwing in. Once the screw and clip are tight, remove the scrap board. This helps ensure the fastener stays fully straight while remaining boards are attached after a row of clips are installed. Hold the scrap board in place and align the screw hole in the fastener with the center of the joist. Secure fastener and continue along the length of the board, adding fasteners at every joist.
When installing ThermoClip™ ExtremeTC™ fasteners, DeckWise® spacer tools are provided to ensure fastener spacer legs are not overly compressed while installing deck boards. Remove spacer tools after each deck board is fastened.

Repeat step 10 until all deck boards are installed up to the last board. Slide the next board into place, making sure fasteners fit into the edge groove. Install the next row of ThermoClip™ fasteners on the opposite side of this board and fasten in the same method used.
On the last deck board, fastening clips will not be used and it will be necessary to fasten the outside edge with face screws every 24 inches. Optionally, these screws can be concealed by countersinking a 3/8" hole and using wood plugs. It is also recommended to apply a small amount of construction adhesive on the outside joists for leveling and to reduce possible noise.
Where two boards meet on a single joist, the preferred method is to use a sister joist parallel to the main joist. Install 2 (two) ThermoClip™ Hidden Deck Fasteners — one on each joist — where the boards meet. Only one centered fastener can be installed at their meeting point.
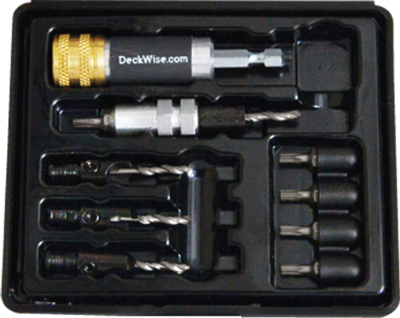
Using the DeckWise® Drill & Drive™ tool to build your deck makes predrilling, plugging, and driving screws much faster than standard drilling and driving.

Apply WiseCoat® water-based Wood Sealer or Ipe Oil® and Ipe Oil® Plus™ Hardwood Deck Finish oil-based formulas. Each are deep penetrating for Thermally Modified Wood, Hardwoods, and most wood decking.

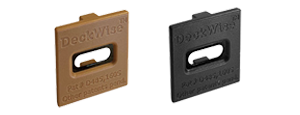
DeckWise® JoistTape™ is a waterproof wood flashing used to overlay onto deck joists creating a moisture barrier preventing wood rot. Choose from Butyl or Asphalt tape material. Easily apply to decking joists, around deck support posts and over ledger boards.